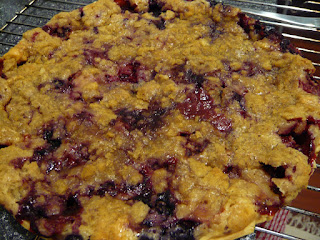
Yesterday I made these.
Was so intrigued by the colors and thought this would taste delicious!
Indeed they were!
It sure takes a while to set but they were beautiful pink. I can imagine these being served on V-Day. However, I'd make a few changes next time. Use a little bit of pink/red coloring to enhance it. The plus to this is that I've all ingredients in my pantry =)
This recipe has been cut in half. To make a full cake, simply double the recipe!
Raspberry Moussecake
Ingredients
25 g flour
10 g cocoa powder
2 yolks
35 g sugar
1 tbsp oil
25 mls water
2 egg whites
To make the bottom chiffon cake
Preheat oven 180C
Line baking paper in pan.
Sift flour and cocoa powder together. In a separate bowl, whisk egg yolks and add half the sugar. Whisk til creamy. Gradually add oil and water. Tip in the flour mix and combine. Whisk egg whites with remaining sugar til soft peaks form. Fold into chocolate mixture.
Bake 15 - 20 minutes til toothprick inserted comes out clean. Leave to cool.
Cut your chiffon cakes into round moulds. Put 10 g of caster and 25 mls water in a small bowl and microwave til bubbly. Brush the mixture on top of cakes. Leave the cakes in the fridge while you continue to make the mousse.
Tips: I used a small-ish loaf pan to bake my bake. And as for the moulds, I used small sized plastic trifle cups which got me 3 wonderful round cakes. The rest of the chiffon cakes I just dumped them into 2 other trifle cups and swirl the mix around.
Raspberry Mousse
Ingredients
150 g raspberry puree - I pureed my berries with a fork so I get some berry chunks in my mousse =)
45 g caster
3 g gelatine - I'd reduce this tad next time for a less gelatine-like mousse
150 g cream
How to make
Put 1 tbsp warm water into a small bowl and dissolve the gelatine in. Heat 1/2 of the puree with sugar in the microwave wil hot. Combine gelatine mixture into hot puree and whisk til well combined. Add the remaining puree and leave to cool a little. Whisk cream til soft peaks form and fold into puree mixture.
Top cakes with mousse mix. Refrigerate for at least 4 hours or overnight.
Tips: The mousse mixture I topped with 5 tablespoons each onto each cake moulds. They fit perfectly.
Verdict: It's definitely for a sweet-sour tooth type of person. I don't particularly like the chiffon cake but after spending an overnight in the fridge, I don't quite mind it at all. The sweet chocolatey taste and sweet-sour taste from the mousse blended so well together.
Definitely a keeper =)
Saturday, April 18, 2009
Thursday, April 16, 2009
Mascarpone Marbled Cheesecake
We had few friends over for dinner so I made these for dessert!
After filling up all my mini cups pan, there are more chocolate batter than whites so I topped chocolate batter on whites instead into a muffin pan. I must say, the chocolate cheesecake is SO SO gooood!! Much better than the cheesecake itself!
Here's the recipe
Mascarpone Marbled Cheesecake
(A)
50 g Oreo cookies, crushed and fillings removed
(B)
100 g bittersweet/dark chocolates - use good quality chocolates
40 ml (2tbsp) water
300 g cream cheese
120 g sugar
2 eggs
140 g mascarpone cheese
1 tsp vanilla extract
How to make
Preheat oven to 160C.
Spray moulds with olive oil or butter.
Cover bottom pan with foil.
Sprinkle A into bottom of the moulds, pressing lightly.
Combine chocolates with water and melt together.
Beat cream cheese til smooth. Add sugar.
Add eggs one at a time, beating smoothly.
Mix mascarpone cheese and vanilla extract together.
Add to cheese mixture and mix til smooth.
Take out 1/3 cup of mixture and mix it into chocolate mix.
Alternate cheese mixture and chocolate mixture into moulds filling up to top. Start with cheese mix, then chocolate mix, ending with cheese mix til mixture comes up to the brim. Using a toothpick, swirl mixture in moulds carefully not to overmix.
Put kettle on. Place moulds into large roasting pan. Pour hot boiling water into roasting pan til it comes up to half mould bottom level.
Congratulations you've mastered the water-bath baking method :)
Depending on the size of your mould, I baked 15 mins. If using muffin pans, bake up to 30 mins. The centre should come out slightly wobbly in the centre.
Cool cheesecake on rack and put them into the fridge to set for at least 4 hours or overnight.
Verdict: The taste is absolutely yummy though the crust didn't turn out crumbly. In fact it blended well into the cheesecake. I LOVE the chocolate mix, next time I'd make it all chocolate instead of marbling them =p
38 weeks!
YUMMO!
Wednesday, April 8, 2009
Almond and Chocolate Pound Cake with Lemon Curd filling
Hello.
Okay, I know now that at 37 weeks along, I'm supposed to be relaxing at home, put my feet up and lay sprawled on the couch in front of the TV with a tub of chocolate brownie ice-cream..
But!
Unfortunately that is too uncomfortable to do at this stage and I don't think I'm capable of handling that kind of lifestyle for long. So up I went to make myself a little useful and head off to the supermarket. Bought ingredients and did some retail 'baking gadgets' therapy =)
And here's what I turn up with!
Recipe for the pound cake can be found here!
I decided to give the original pound cake a try and used almond essence instead.
Verdict: Don't quite like the taste. I think 5mls of almond essence is too much. Try reducing it to half next time. OR better yet, switch to vanilla altogether.
I melted some choc chips, took out some of the batter and mix. I find the chocolate part is yummy with less almond-y taste. Luckily I made some lemon curd for the filling and these cuppies turned out DELICIOUS!
Not that these little cuppies needed the moist centre, but the lemony tang twist in the middle takes these little ones up another level =) *yum*
Here's the recipe:
Lemon Curd (original recipe from here)
Ingredients (- indicates halved)
3 large eggs - 2 small eggs
2-3 lemons, juiced out to make up to (80mls) fresh lemon juice - 2 tbsp + 2 tsp juice
150 g sugar - 75 g
56 g unsalted butter, room temp, cut to small pieces - 28 g
1 tbsp lemon zest - 1 tsp
How to make
Whisk constantly eggs, lemon juice and sugar on a double boiler til a consistency of sour cream or hollandaise sauce is reached. Check temperature so it comes up to 71C. Remove from heat and put through a fine sieve if lumps appear. Drop butter pieces one at a time whisking through with each addition til butter melts in the mixture. Add lemon zest.
Lay a piece of cling wrap on top of lemon curd surface to prevent skin forming and place it in the fridge to cool. Mixture will thicken more while cooling.
Note: I have halved the recipe and it made up close to half a cup of lemon curd. Just enough for me to fill 12 standard size cuppies!
SMBC (Swiss Meringue Buttercream frosting)
Ingredients
2 egg whites
1/2 c sugar
113 g butter (divided to 1 tbsp each or 14 g segments)
1 tsp vanilla extract
yellow coloring
How to make:
Whisk egg whites and sugar on a double boiler to reach a safe temperature of 160C, whisking constantly.
Remove and place in mixing bowl and whisk away on high speed til stiff peaks form but not dry.
Switch to paddle attachment.
Add 1 tbsp (14g) butter one at a time, whisking til well combined.
Increase to medium-high speed til you get a fluffy consistency.
Lower speed and add vanilla extract and yellow coloring.
Can you decide which design you'd like?
Sorry but can't resists!
Here's our little beast Koda.
Just moments before the flower vase toppled over her!
Thursday, March 26, 2009
Cheesecake Cuppies
Just realized I've not create an entry on my cheesecake cuppies. They were part of those thank-you gifts at the baby shower.
before baking..
Cheesecake Cuppies
Ingredients
(A)
60g digestive biscuits, crumbs
30g butter, melted
(B)
170g cream cheese
75g caster sugar
1/2 tsp vanilla extract - i used paste
1/4 tsp lemon zest
tiny pinch of salt
1 large egg
1 egg yolk
60g sour cream
(C)
canned strawberries
1 tsp gelatine
How to make
Preheat oven 170C.
Combine A. Press them down with fingers or back of a chopstick into small cuppies paper. Bake 5 mins. Remove and let cool.
Cream cream cheese and gradually add sugar. Cream til smooth. Add vanilla, lemon zest and salt. Beat well. Add eggs one at a time. Ensure each addition is well incorporated. Add sour cream and mix well making sure there's no lumps in the batter and batter is silky smooth.
Pour batter into cuppies lined with biscuit crumbs. Fill to leaving tiny space on top of paper for topping later. Bake 15 mins til tops crack a little and leave to cool. Cheesecake tops will sink slightly when cooled.
Drain (C) keeping both juice and strawberries separate. Place juice in saucepan on medium heat and let it come to boil. Place 3 tbsp of hot juice in a small bowl and sprinkle 1 tsp gelatine. Whisk til completely dissolved. Add mixture back into saucepan and leave til juices slightly thickened. Remove from heat and let cool.
Carefully spoon juice on top of cheesecake cuppies. Place a strawberry on top and place cheesecake cuppies in fridge for an hour or more til topping sets.
Enjoy!
Saturday, March 21, 2009
Cheesecake Pops
Baby shower thank-you gifts!
I am unsure how my cheesecake turned out firm and "scoop-able". They didn't stick my hands and were just perfect to round into balls.
I took out my cheesecake after 40 mins and it was browned on top. The middle even cracked slightly, but just a little. I thought to myself, "..uh-oh, doomed!" So with crossed fingers I cooled it and place it carefully inside the fridge overnight.
The next morning, I scraped the top of my cheesecake and the bottom layer. The bottom softens a little to make them perfectly scoop-able and no mess! I am not sure how or why most end up with gooey, mess with theirs but I suppose I missed that soft, gooey cheesecake with these!
Perhaps it's my measurements? I halved the recipe accordingly but not entirely. And used a hand mixer. Maybe I overmixed them. Or maybe it's the square tin pan I used instead? Anyway, here's my version.
Cheesecake Pops
Ingredients:
600g cream cheese
180g caster sugar
17g flour
1/8 tsp salt
1 large egg + 2 small eggs (42g)
1 large egg yolk
1 tsp vanilla paste
30mls whipped cream
30-40 (4 inches) lollipop sticks or skewers
some semi-sweet or dark chocolates and shortening
other types of topping (crushed cereals, graham crackers etc)
How to make:
Preheat oven at 170C.
Cream together cream cheese, sugar, flour and salt.
Add eggs one at a time, beating well.
Add vanilla paste and cream.
Grease a square tin pan and pour batter in. Set kettle on. Place tin pan in a large roasting dish and pour boiling water in roasting dish til water comes up halfway tin pan. Place roasting dish inside preheated oven. Congratulations, you've set yourself baking in bain-marie style =)
Bake 35 to 45 mins.
Tips: I'd check after 30 minutes. Mine took 40 mins and it was all browned on top.
Remove tin pan from its water bath. Let cool to room temperature, place plastic wrap on it then place it in the fridge overnight. Or at least 3 hours for cheesecake to firm up.
Scoop cheesecake into small balls (25g each) and roll them with your clean hands. I weighed each balls and got exactly 35 balls. Place them on a tray layered with baking sheets. Stick your lollipop or skewer stick into each ball. Freeze 1-2 hours til very hard.
Melt shortening and chocolate in microwave for few seconds stirring each time. Dip frozen cheesecakes into chocolate mix and place them back in the fridge for at least 24 hours. They may also be frozen.
Hints: You may use milk chocolate but I find them too sweet. I used 1/4 milk and 3/4 dark chocolate for mine. I also thinned out the chocolates with warm milk. My first try was milk chocolate and hubby said the chocolate was too empowering and too thick. Hence, the variation.
I must admit, I was very reluctant to make these pops looking at the amount of cream cheese required in the original recipe. 5 blocks!! But seeing it's a special occassion and I do want to make personalized thank-you gifts, I thought I'd halve the recipe and make just enough for the guests.
Love eating these frozen. Some may melt at room temperature while others don't. Am not quite sure why. I suppose the ones dipped with melted chocolate and warm milk would.
Friday, March 20, 2009
Carrot Cake Cuppies
2 cuppies in 2 days?
If you're wondering, no I'm not craving madly over cuppies in this late pregnancy. These (and yesterday's) cuppies are exclusively to feed approximately 20 ppl at our baby shower tomorrow! I've also a chocolate mousse cake setting in the fridge and cheesecake pops in the freezer. Mini quiches in the oven and cheesecake cuppies to make later in the day as thank-you gifts.
I haven't tried any of these cuppies or the cake. But my husband has! And I shall trust his taste-buds when it comes to food.
This carrot cake is supposedly served as one round cake or loaf cake. I think cuppies are cuter for the occasion. Minis should go very well with babies =)
Carrot Cake
Ingredients:
(A)
2 small egg yolks
3/4 c vegetable oil - i used cooking oil
65 g caster sugar
65 g brown sugar
1 c grated carrots - 1 medium sized carrot
50 g chopped walnuts
(B)
125 g cake flour
1/2 tsp mixed spice
1/2 tsp cinnamon powder
1/2 tsp salt
3/4 tsp soda bicarb
(C)
2 small eggwhites
How to make:
Whisk egg yolks, oil and sugar.
Combine remaining ingredients (A).
Mix and sift ingredients (B).
Add to ingredients (A) and stir with spatula.
Preheat oven to 180C.
Beat ingredients (C) til stiff peaks form.
Fold lightly into combined mixture (A) and (B).
Bake 10 mins as mini cuppies.
*If you've doubled the recipe to make one whole cake, bake 30-45 mins.
Tips: This recipe is halved to make 30-35 mini cuppies. It can easily be doubled to make muffins or one whole cake!
Cream Cheese Frosting
Ingredients:
40 g butter
80 g cream cheese
40 g icing sugar
How to make:
Beat everything together.
Tips: I had quartered the original recipe to suit my mini cuppies (which I truly regret, it's such a yummy frosting!). It made just the right amount to frost 35 mini cuppies.
Thursday, March 19, 2009
Two-toned Cupcakes
The last time I made little cuppies was er.. very long time ago. Could be a decade. Mind you, I started showing off my baking skills at the age of 3! Of course it was on the kitchen floor playing with eggs, milk and flour on the carpet =p
Anyway, this was meant to be a cherry and chocolate cuppies with pistachio swiss meringue buttercream. But mine decided to have a mind of its own and turned out to be a vanilla and chocolate cuppies with pink swiss meringue buttercream instead!
Spumoni Cupcakes
(makes 48 mini cuppies)
Ingredients:
57 g butter
1/4 c + 2 tbsp sugar
3/4 c + 2 tbsp flour (for chocolate version: reduce amount to 1/2c and add 1/4c or about 32g of cocoa powder)
1 tsp baking powder
1/4 tsp salt
1 large egg
1/4 tsp cherry extract (for chocolate version: substitute with 1/2tsp vanilla extract)
1/4 c milk
1/8 c chopped cherries (omit for chocolate version)
How to make:
Beat butter and sugar til light and fluffy.
Add egg. Beat.
Add cherry extract. Mix.
Combine flour, baking powder and salt together.
Mix by hand half flour mixture to butter mix and mix til well combined.
Add milk. Mix well.
Add remaining flour mixture til just well incorporated.
Fill mini cuppies liners with half cherry mixture and half chocolate mixture to make 3/4 full. Bake 10 mins.
Tips: if your cherry cupcakes lack color, I'd suggest adding bit of red coloring. But if you're happy with it, like mine, just leave it looking like vanilla cuppies =p
Swiss Meringue Buttercream Ingredients:
2 egg whites
1/2c sugar
113g butter (divided to 1 tbsp or 14g segments)
1 tsp vanilla extract
rose pink color
How to make:
Whisk egg whites and sugar on a double boiler to reach a safe temperature of 160C, whisking constantly.
Remove and place in mixing bowl and whisk away on high speed til stiff peaks form but not dry.
Switch to paddle attachment.
Add 1 tbsp (14g) butter one at a time, whisking til well combined.
Increase to medium-high speed til you get a fluffy consistency.
Lower speed and add vanilla extract and rose pink color.
Tips: the buttercream is a bit tricky to make. With lots of confidence and patience. I did not however encounter the problem of it turning soupy like many did. But mine curdled a little halfway through butter addition. But keep whisking away (with fingers crossed tightly!) and it will come together in the end.
Saturday, February 14, 2009
Tuesday, February 3, 2009
Blueberry Pie
I honestly do not remember where I got this recipe from =( I've searched high and low for it and hate to paste a recipe without knowing its source. Feels like "plagiarism" to me =P
But it was a good pie. As usual I cut down the recipe and cut down the sugar to half. It's rather sweet if you read the recipe and used frozen blueberries instead. I remember baking this the day before my family arrives from Malaysia!
Blueberry Pie
Ingredients:
(A)
435 g fresh blueberries
1 pie crust
200 g white sugar - used brown sugar and lessen the amount
40 g flour
1/8 tsp salt
2 eggs, beaten
115 g sour cream - added a little extra
I also added 1 tsp of vanilla extract
(B)
100 g white sugar - used brown sugar and lessen the amount
60 g flour
55 g butter
I added few dashes of cinnamon powder
How to make:
Combine dry (sugar, flour and salt ) and wet (eggs and sour cream) in ingredients (A) together. The mix wet to dry ingredients.
Put your blueberries in the pie crust and pour the mixture over.
Combine ingerdients (B) to resemble course grainy breadcrumbs-like texture and sprinkle over the pie mixture in shell.
Bake 180c for 50-55 minutes or til golden and browned.
Monday, February 2, 2009
Shortbread Cookies and Pound Cake
Yep! Shortbread Cookies this time. Few weeks back we ran out of cookies in the house and hubby loves shortbread cookies so he actually google-ed around for the basic recipe. I got my tools and oven ready, and.. a way we go!
Recipe can be found here
I wouldn't bother putting the recipe here since I didn't make any changes to the recipe and they're very basic cookies. I bet if you tweaked the recipe a bit here and there or simply by substituting white sugar to brown sugar, they'll taste brilliant =)
before going into the oven =)
into the cookie jar, quick!!
Though they're plain cookies, for a shortbread cookies lover, they sure are irresistible
Few days later I felt like having pound cake. Remember Sara Lee's Marbled Pound cake? They were my favourite! Frozen! I used to absolutely love eating them frozen. Yep, you read that right =p I know, my tastebuds are crazy like that!
So after scouting around for a basic pound cake recipe, I found one here
Of course I've made some changes and cut the recipe in half =P
Here's my version.
Ingredients:
100 g shortening - i used all butter
225 g butter
500 g white sugar
5 eggs
10 ml almond extract - used vanilla bean paste
235 ml milk
2 g baking powder
430 g cake flour - plain flour
How to make:
Preheat oven at 150c
Grease your cake pan. I sprayed mine with olive oil spray.
Cream butter and sugar til they turn pale and creamy. May take a bit of time. I used a normal hand mixer.
Add your eggs, one at a time. Ensure each addition is well incorporated.
Add the almond (or vanilla) extract.
Mix well.
In another bowl, combine the baking powder and flour.
Alternate flour and milk into the egg mixture, by starting and ending with flour.
Mix well on each addition.
The luscious batter
Pour batter into your cake pan and bake for 45 mins to an hour. Or until top turn golden and appears dry. You may insert a toothpick to check if middle is cooked.
Tips: My only tip to this recipe is to make sure the butter and sugar is well-creamed. And each addition to the mixture is well incorporated. Pound cake is a very traditional cake and can be delicate too. Ensure everything is well mixed and you'll have a very moist, dense cake in your home =)
This cake suits any occassion. Make some icing and ice them for a great birthday cake. Or layer it for that special someone. This cake can also be kept for days covered in the fridge or frozen in the freezer. We kept our cake in the fridge for more than 3 days and it still remains dense, soft and moist. Delicious! =D
Sunday, February 1, 2009
Honey Oat Bread
I have lots of leftover oats from crumbing our fish fillets the other night. Somehow eating oats by itself for breakfast doesn't seem very appealing to me. So there sit my oats in the cupboard for few days untouched.
With many success baking sweet and savoury buns and rolls, believe it or not I always fail making a normal loaf bread. It somehow rose too much or burnt on top or decide to just collapse on me. Very frustrating.
So tonight I decided to give it another try. Rather nervous, I'd try with oats in them. To make it my own, I tweaked the recipe by substituting the sugar with honey. Here's the original recipe and my version of it.
Light Oat Bread
Ingredients:
295 ml water
25 g margarine - olive oil
6 g salt
375 g bread flour
40 g rolled oats
25 g brown sugar - blue gum honey
6 g active dry yeast
few dashes of cinnamon powder
How to make:
Preheat oven 175C/350F
Combine dry ingredients.
Make a well in the centre.
Combine yeast, suger (or honey), butter and warm water in a separate bowl. Leave for few minutes til frothy and creamy. Add yeast mixture to the dry ingredients and mix.
Knead 10-15 mins. Proove for an hour or til doubled in size.
Punch dough with your fist. Shape and place dough into prepared loaf pan.
Leave to rise again for 30-45 mins.
Bake 30 mins.
Tips: The recipe calls for bread maker but I don't have one so I knead the bread by hand about 8-10 mins. The dough was a bit sticky so while kneading I kept adding flour (up to 1/4c more, maybe?) to my workbench and hands til I get a smooth dough. The oats didn't completely disappear, it was still there only I think the amount of oats are not enough to show in the bread too much, which is great for hubby (whom would freak out if he sees them!) and for fussy little eaters. The entire house smelled of bread and honey when it was in the oven. Beautiful!
Savoury Crepes (Dadar Berlauk) and Sausage Buns
Made these few days ago. I miss my mom's version of dadar berlauk. I know some may call these differently but this is what she calls them. I remember she used to make them for breaking fast during the holy month of Ramadhan.
I'm not entirely sure of her recipe but this one tastes quite the same. She added sesame oil and spring onions to the batter. A Chinese friend taught her to make them. She doesn't fry them, just roll them up and ready to eat.
This recipe I got from a website and it's pretty much the same how you'd make a crepe batter. Only add splashes of sesame oil and finely chopped spring onions. For the filling, any type of filling suits those delicate, soft crepes :D
I'll put the recipe up here anyway.
Ingredients:
For fillings: - there are many variations to fillings. I made a curry based for this one.
Onions
Garlic
Minced meat (beef/chicken/lamb)
Curry powder
Potatoes
Tomatoes
Celeries
Mixed veges
Salt and pepper
How to make:
Saute onions and garlic. Add mince and curry powder. Add potatoes, tomatoes, celeries and mixed veges. Fry til dry, season to taste. Let cool.
Meanwhile, you can work on your crepes.
Ingredients:
For crepes:
1 cup flour
1 1/2 cups water
1 egg
1 tbsp oil
salt
splash of sesame oil
spring onions, thin strips
How to make:
Blend all ingredients in your food processor or whisk vigorously. Batter works better when left for 30 minutes before use. Wipe oil on your pan with a kitchen towel. Spoon batter onto pan and swirl to make thin crepes. Once top dries and cooks, remove from pan.
To assemble, pile a tablespoon of filling onto a crepe and roll it up as you would making spring rolls.
If you want to try the fried version, prepare:
1 egg, beaten
breadcrumbs
Dip the rolled crepes into egg mixture and roll onto breadcrumbs. Leave on a rack to sit and continue with the rest of the batter. I find resting the crumbed crepes before frying makes them set properly.
Tips: Ensure the spring onions are thinly sliced as possible. Crepes are very delicate. Be extra careful when handling or it may tear. And I mean, extra careful ;)
Then, I made these!
It was a long weekend with Australia Day last Monday so the shops were having massive sale on barbecued meats (steaks, sausages, patties, etc). We bought a 2kg rack of thin sausages for 6 dollars! :-D
So after dropping by the supermarket and bought some yeast, I started this project. Sausage buns! YUM!
The buns are pretty much a simple, basic bread bun recipe.
Ingredients:
400g bread flour
1 1/2 tsp instant dried yeast
1 tsp salt
1 tbsp sugar
250ml warm water
3 tbsp butter/oil
Mix dry ingredients together. Add wet ingredients and mix til well combined. Knead by hand 10-15 minutes til smooth. Roll up to a ball. Brush bowl with a little olive oil, tip ball of dough into bowl so all ball surface covered thinly with oil. Cover bowl with cling wrap and place bowl at a warm, dry spot til doubled in size. I usually wait 45-60 minutes to prove it.
Punch dough with fist to let air out. Tip dough onto your working bench - floured. Knead for 1 minute til dough returns to its original size and shape your dough as you like. Once shaped, place them onto your greased baking tray and prove again til it doubles in size. Approximately 30-45 minutes.
Place your lovely looking buns into a pre-heated oven of 200c and bake for 20 minutes or buns browned and bottom sounds hollow when tapped.
Variations: Some dough I had rolled them with curry powder and breadcrumbs. I've also spread some chilli sauce and mayo into others before enveloping the dough with my sausages. If you like, you can turn them into pizza wheels, adding you favourite pizza sauces or mix cubed cheeses into the dough to make yummy sausage and cheese buns. Options and variations are endless :D :D
Saturday, January 31, 2009
Pizza Pinwheels
My husband loves these. He prefers his pizzas this way rather than the traditional triangle slices. I made my own pizza dough following Ainsley Harriet's recipe from one of my recipe books. I love his pizza base. It's the softest, easiest, most wonderful pizza base to my humble taste =)
Here's the recipe.
Ingredients:
(A)
350g bread flour
7g instant yeast
1 tsp salt
(B)
2 tbsp olive oil
225ml warm water
(C)
2 tsp polenta (also known as cornmeal)
How to make:
Mix (A) in your food processor. Combine (B) and add into (A). Process til dough forms. Knead 10 mins. Prove for 1 hour.
Punch and cut dough in half. Flatten one of them into rectangular shape, spread dough with long-side towards you with your favourite pizza base sauce. Top with your favourite toppings. For this one I had put in according to whatever there is in my pantry. Olives, jalapenos, leftover minced meat, mushrooms, bbq sauce, mozarella cheese, mayonaise and chilli sauce. You may add anything you like, choices are endless. Main ingredient is pizza sauce and mozarella cheese. The simplest and delicious toppings I had was tomatoes and fresh basil ;-) ;-)
Roll up your rectangular shaped dough to a long log. Then carefully slice up the rolls into even sizes. Dust your pizza pan with the polenta (cornmeal) and spray with olive oil. Place your roll-ups onto the pan. Bake in a 200c preheated oven until golden and tops browned. YUM!
For my all-time-favourite homemade special pizza base sauce:
Olive oil
Chopped tomatoes
Tomato puree
Fresh thyme
Garlic - chopped
Salt and pepper
Let be thickened in a pot. Leave to cool and spread on your pizza dough
I don't quite remember when I made this but it has to be somewhere mid 08. When the weather's cold and too lazy to go out for a meal. Yeah, this pizza's the way to go for a quick, satisfying homemade meal =)
Friday, January 30, 2009
Spiced Lamb Shank with Mashed Sweet Potatoes
April 08 must've been cooling down on us. I remember I made this stew out of the extra lamb shanks we had. It's from Jamie Oliver and I've taken the recipe from Kitty's website.
As usual I had made few changes to the recipe unfortunately I don't quite remember how much I had altered. I cut the recipe into half to feed the two of us and served it on a bed of mashed sweet potatoes. Anyway, this dish is definitely worth trying!
Spiced Slow-Cooked Lamb Shanks
Ingredients:
4 lamb shanks
(A)
Salt and pepper
1 tsp coriander seeds
1 dried red chilli - I used 2 dried chillies
1 tbsp fresh rosemary - chopped
1 tsp dried marjoram or oregano - I used fresh oregano
(B)
1 tablespoon flour
(C)
1 tablespoon olive oil
(D)
1 clove of garlic, finely chopped
1 large carrot, quartered & finely sliced
6 sticks of celery, quartered & finely sliced
2 medium onions, quartered & finely chopped
pinch of salt
2 tablespoons balsamic vinegar
170ml dry white wine - replaced with beef stock
6 anchovy fillets
2 x 400g tins of plum tomatoes
1 handful of fresh basil, marjoram or flat leaf parsley, roughly chopped - I used fresh parsley and coriander
How to make:
Combine (A) in mortar and pestle and rub onto your lamb. Then dust the shanks with (B). Brown the shanks on all sides with (C), remove.
Saute garlic, carrots, celeries, onions and salt. Add balsamic vinegar and beef stock and simmer. Then the anchovies and tinned tomatoes. Place lamb in the sauce, bring to boil.
Put on a lid on your casserole dish and place it in a preheated 175c oven for 1 1/2 hours. Remove lid & cook for a further half an hour. Stir in your freshly chopped herbs.
For the mashed sweet potatoes
Place peeled potatoes in a salted boiling water and boil til a fork pierced easily through. Mash with milk and butter. Add a splash of balsamic vinegar. Season with salt and pepper.
Enjoy! :)
Thursday, January 29, 2009
Basic Crepes, Blintzes with Blueberries and Ice Cream
Made these some time ago. If the dates on my camera are correct, it would've been in July 08 :)
The recipe was from Delicious. 5 of the best by Valli Little. It's a compilation 5 of the best pastas, soups, rice, meat, cold desserts, puddings, etc etc. I think Mama bought this one for me when I was back in Malaysia for holidays last year.
Originally this recipe is called Blintzes with Sour Cream and Cherries. And of course I had changed the recipe a bit not only to suit my taste but also to what's available in my kitchen hee! :D I made half the recipe for the two of us.
Here's the recipe
Ingredients:
(A)
175g cottage cheese
100g cream cheese
1 egg yolk
1/2 tsp vanilla extract
1 heaped tbsp caster sugar
1/2 lemon, zest only
(B)
20g unsalted butter, melted - I used olive oil spray
12 crepes - I made my own, see recipe below. I find store bought aren't as thin as I like them to be
sour cream to serve - replaced with vanilla ice cream
(C)
1 x 425g can of pitted cherries in syrup - replaced with fresh blueberries
75g caster sugar
2-3 tbsp Kirsch (cherry brandy) - omitted
1 tsp arrowroot - used cornflour
How to make:
Place ingredients (C) except arrowroot in pan. Stir til sugar dissolves and add in Kirsch (if use). Mix arrowroot (or cornflour) with 20ml water til smooth. Add to warm syrup and stir til thickened. Let cool.
Preheat oven to 180c and brush baking dish with butter or spray with olive oil. Place ingredients (A) in a food processer or whisk vigorously by hand til smooth.
Place about a tablespoon of cheese mixture onto crepe and fold to make parcel. Gently put your parcels (folded-side down) onto your baking dish. Brush tops with melted butter or spray with olive oil. From here you may cover them and place in the fridge til you're ready to bake for 15 minutes.
Serve with sour cream (or ice cream) and pour cherry sauce (or blueberry sauce on top)!
Now for the homemade crepes
Ingredients:
150g plain flour
1 tsp caster sugar
240ml milk
2 eggs
pinch of salt
Blend all in a food processor or whisk vigorously. Set aside for 30 minutes. Grease pan thinly with oil/butter, tip and swirl mixture thinly onto pan and cook til the top looks cooked and dry. Tip over. Repeat til all batter is used.
These Blintzes are rather similar but with much more texture than Crepes Suzette. And also Crepes Suzette has burnt-tangy taste than these sweet-sour-cheesy number. I love this version much better :D
Wednesday, January 28, 2009
Prawns Pineapple Rice
There were many recipes tried in the past few months. Some I've taken the the extra step snapping pictures of, some not. However, today we experienced a scorching and sweltering maximum of 43C (hottest in 5 years!!) So, lots of cool cut fresh fruits, water and looks like this preggie lady ain't goin anywhere today!
I made this today after scouting around for some new recipes. Taken from here but I've changed the recipe quite a bit to suit my taste :P
Here's my version
Ingredients:
(A)
2 tbsp butter (or olive oil)
1 tsp ground chillies (cili boh or sambal oelek)
1 tsp tomyam paste (or tomyam cube)
1 onion - thinly sliced
3 cloves garlic - minced
1 celery stalk - sliced
1 stalk lemongrass - sliced or bruise the bulb end
2 kaffir lime leaves - sliced
a splash of fish sauce
1/2 tsp turmeric powder
salt to taste
a quarter of pineapple - diced (you may use the tinned version)
3 cups rice
4 cups water
(B)
200gm peeled prawns
1 diced tomato
2 tbsp fresh chopped coriander
2 tbsp fresh chopped parsley
sliced chillies - if you like it spicy
How to make:
Saute ground chillies, tomyam paste, onions and garlic til fragrant. Add celery slices, lemongrass and kaffir lime leaves. The smell shall fill your kitchen by now :) Splash in some fish sauce, turmeric powder, salt and pineapples. Tip in your rice and ensure they are well incorporated and coated.
Transfer rice into your rice cooker and add 4 cups water (or as you normally would in your rice cooker). Keep an eye on it, as soon your rice has absorbed most of the liquid, stir in ingredients B and keep the lid on til ready to serve ;)
Enjoy!
Saturday, January 24, 2009
Pistachio Souffles
I've entered into third trimester today hence a little 'celebration'
Pistachio Souffles
20g plain flour
150ml milk
60g caster sugar
4 egg yolks
30g soft unsalted butter
100g ground pistachios - I grind my own with mortar and pestle. I like mine to have some crunch to it, not completely ground
2 drops almond extract
1/2 tsp vanilla extract - I used vanilla bean paste
1/2 tsp orange-flower water
5 egg whites
pinch of salt
10g dark chocolate squares - I used 2 small blocks of Cadbury chocolates
Preheat oven to 200C
Grease 4 ramekins or souffle cups with butter and dust with sugar.
Place the flour in a saucepan with a little of the 150mls milk just enough to blend. Whisk til no lumps appear. Add in the rest of the milk and the 60g sugar. Whisk over medium heat til almost to a boiling point. Take off from heat and keep whisking which will then make it thick and glossy. Let it cool a little, otherwise when you add in the egg yolks, it may just scramble. Add in 4 egg yolks one at a time, whisking on each addition. Then whisk in the 30g butter.
Now watch that mixture in your hands turn custardy-yellow. Yum.
Add your ground pistachios, almond, orange-flower water and vanilla extract and mix them all in well. Watch it now turn pistachio-green and smells intoxicatingly good.
Here's how mine look like.
With a hand mixer, beat your 5 egg whites in a clean, dry, glass bowl with a pinch of salt til soft peaks form. Sprinkle 1 tbsp of caster sugar and beat again til thick and glossy.
Take 1/4 of your eggwhite mixture and lighten your pistachio mix. Fold the rest in.
Place mixture into your ramekins half full. Top with your chocolate squares.
Cover with the rest of your mixture.
Now we have a hidden chocolate secret :)
Place your souffles into the preheated oven, turning it down to 180C and bake for 12-15 minutes.
Ta-dahhh!!
Revealing our little dark secret
Serve immediately.
I must admit mine took longer than 15 mins. Once it has risen above the ramekin brims and golden on top, it's done. I made half this recipe coz well, there's only the two of us here. This recipe was taken from Nigella Lawson's "How to be a Domestic Goddess" book. Thank you Kak Long for this book which has now covered with flour, pen marks, splattered with butter and if you look closely, you might be lucky to find cake crumbs in between the pages. Koda's hobby.
So I may know how to make a yummy souffle. But if you ask me to cook ikan singgang (a very simple Malay dish), I'd have absolutely no idea. If Mak Cha or Mama finds out, I'd be hearing a round of sing-a-long nag thousands of miles away.
Help!
Friday, January 23, 2009
Garlic Fan Bread
Found this fancy bread on Zack's few month back and felt intrigued to try them out. I halved the recipe to suit both of us and I must admit mine turned out a little burnt. But yummy nevertheless! =)
Garlic Fan Bread
Ingredients:
225ml warm milk
15g fresh yeast - 5g instant yeast
2 tsp caster sugar
450g bread flour
2 tsp salt
30g shortening - butter
1 egg, beaten
55g butter, salted
4 garlic cloves, crushed
2 tbsp fresh chopped parsley
How to make:
Combine milk, yeast and caster sugar til frothy.
Sift flour and salt together. Rub shortening (or butter) into flour mix.
Make a well in the centre of flour mix and pour in yeast mixture and egg.
Combine and knead 8-10 minutes by hand til smooth.
Place dough in a bowl covered with thin olive oil, turning it over so oil covers entire dough ball.
Cover bowl with plastic wrap and leave to prove til double in size.
Mix the 55g butter, garlic and chopped parsley.
Preheat oven 190C.
Spray muffin tins with olive oil spray or butter.
Punch dough and knead 2 minutes. Roll out into rectangular size to 80cm x 30cm.
Spread butter, garlic and parsley mixture.
Cut lengthways to 6 strips.
Layer each strip on top of one another and cut into 16 pieces.
Place each piece in prepared muffin tins and leave to prove for 30 mins.
Bake 20 mins til golden.
This recipe takes time and effort to make. And keep a close eye when its baking in the oven. An alternative to the traditional garlic bread =) You can vary them and make them into sweet, soft cinnamon fan bread. Anything to your fancy. Enjoy!
Subscribe to:
Posts (Atom)